True Confessions: The Day My “Aah…” and “Aha!” Intersected

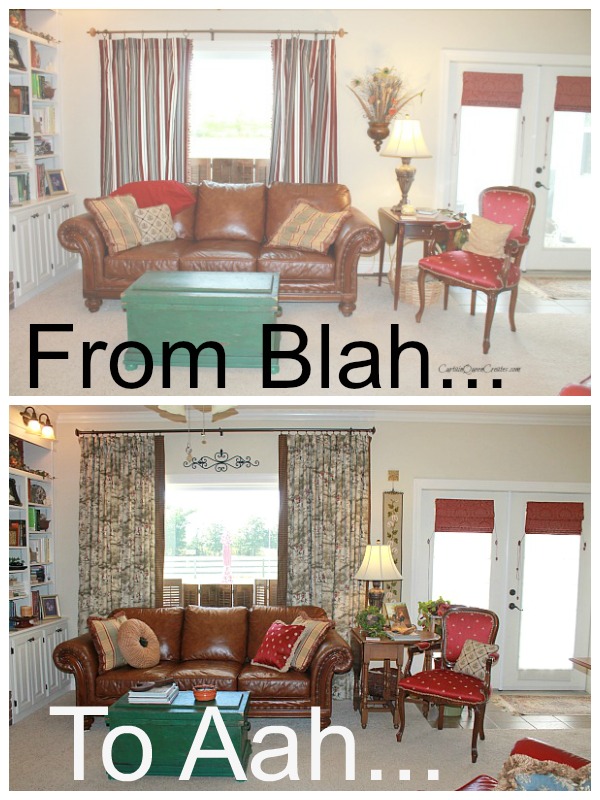
Why did I wait so long?  The panels hanging on the family room window when we moved here were exactly the right colors, but they needed to go.  They were off-center with the sofa and needed to hang higher on the wall.   But, I put off the project for over eight years!  Why?

Within a week of deciding it was time, we had new panels that transformed the room instantly.  It only took a couple of hours each day, and after a few days, voila!  Boom!  Aah…

Blah-to-Aah...-Window-Treatments-@-CurtainQueenCreates.com

When you know you can make something better with only a little bit of sewing, why put it off?

Because you don’t realize the difference new creations will make
until after they’re complete and hung in the room.

Sometimes, our response to being in a room goes unrecognized because it’s subconscious.

It’s only after we have the new or different  that we realize a fresh and deeper love factor,  a feeling of loving being in that room!

Our mood lifts.
Our happy happens.
Our love emotion feels.

Sitting in our family room with those new window treatments, I experienced that feeling I’d forgotten was possible.  It was then that my “Aah, I love this room now!” intersected with “Aha! This is what I want others to experience!”

This is my heart’s desire for everyone to feel in their own home!

Two months ago marked a year since then.  I’ve worked since January towards getting you the help you might need to get that feeling.  I finished the beginner e-course – LEARN TO SEW Home Decor – to help you in your journey of creating soft furnishings you love to come home to…to live with…to surround yourself in.

free-videos-here

If you currently know how to sew, there will be other courses for you coming soon – courses for new techniques to make your sewing easier, more enjoyable, and more productive.

If you don’t know how to sew, the LEARN TO SEW Home Decor e-course could be for you.  If you’ve tried learning to sew before and it didn’t work out, I understand.  Of course it didn’t work!

There are many barriers to finding success with the old way.  Now you can learn in the comfort of your own home, at your convenience, and on your time schedule.  No hauling your sewing machine across town for class times set by someone else.  Watch the lesson videos while at your machine, following along, at any time you choose.

Testers completed the entire course of seven short lessons in under five hours.  For starters, I’ll guide you through threading your machine.  How many times have I heard it?

I have a sewing machine, but I don’t even know how to thread it.

Can you imagine getting to the point quickly where you can thread your machine without even looking at the manual?  Yes, it will happen!

In the course of the seven lessons, you’ll complete two projects – a simple pillow and table topper.  While you mull over the idea of learning some new sewing skills, get free videos for starters.

free-videos-here

So…do you know how to sew?

Blessings~

Signature


Save

Save

Save

Save

Save

Save

Save

Save

Save

Save

Save

How to Choose a Machine for Home Decor Sewing

HOW DO YOU CHOOSE A MACHINE WISELY?

That has been a popular question this week.  I’ve been planning to make a video on exactly what you need for sewing home decor.  Later.

Readers are asking questions about sewing machines regarding my  3-Step DIY on Covering Outdoor Cushions post.  Personal emails come from access to my contact page.  The questions keep coming up NOW.  So, I decided to help you navigate this as far as my knowledge on the subject and the level of research I’ve personally done.

There is a difference.  I know this because I started out my sewing apprenticeship (ha!) in clothing.  And, the machine needs are different.

Can I just be real  about this topic – the topic of making clothing – again?  No offense to ANYONE who is proficient at sewing clothing.  I promise.  I envy your clothing queendom.  But, then again, I don’t. (Hey…I promised real.)

Sewing clothing, for me, is tedious – and a huge use of my time.  When I could go to a store and buy something I like (even better!) and pay just as much as I spent on fabric for the item that takes me days  to make, what’s the point?

There’s no wisdom in that (for me).
Choose Your Sewing Machine Wisely

Sewing home decor is a different story.  There is a huge difference between the look of a room (and the cost of it, too) that is made with window dressings and textile accessories that have custom fabrics and fine finishing.

Hand-sewn hems – deep hems – for the lush-ness of custom,

Linings added for strength, flow, durability, and longevity…,

Companion fabric accents and trimmings for added details and decorative punch,

Colors perfectly blended for the feel you desire your room to exude.

Yes, you get all of that!  Oh, and that is why you need a certain type of sewing machine – unless you have an unlimited supply of green to pay someone else for the look of custom.

But why do that when you can do it yourself and save thousands?  And that’s the major difference between making clothing and home decor.  With window treatments alone, you save thousands over a lifetime of making your own.  I never saved a penny with making my own clothing.

Now that I’m finished with my rant, here’s the nitty-gritty  on sewing machine selection – if you’re in the market for a machine to sew home decor.

This machine at first glance appears to be awesome.  Even the reviews are very high at 4.5 stars.

81r4Teow6JL._SL1500_

SINGER 7258 Stylist Award-Winning 100-Stitch Computerized Sewing Machine with DVD, 10 Presser Feet, Metal Frame, and More

Wow!  Look at all those stitches it will make.  Impressive, huh?  You bet.  But…that means more can go wrong with this machine.  Anything electronic that we can’t repair ourselves must be taken to an expert to get it up and going again.

Can I also tell you that for sewing home decor, you’ll never need more than these stitch settings?

The straight stitch,

the zig-zag stitch,

a hem stitch for quick hems (not necessary, but nice to have),

and a button-hole stitch as a bonus.

So, anything in addition to these is extra you don’t need for making window treatments and accessories.  The more that’s there, the more that can malfunction.

The reviews were looking very good on this machine.  It pays to read the Frequently Asked Questions, as well!  When I read the answer to a question about the thicknesses it will stitch over, it stopped me in my tracks.  The answer was, for hemming jeans, zig-zag the edge and turn it under once  and stitch over only two layers.

Here’s your sign:  No double-rolled jeans hem for this machine. Do you hear the buzzer sounding?

How in the world would you sew several layers of fabric when constructing window treatments made of heavy-weight fabric plus lining?  Even a corded pillow requires stitching over six layers of fabric at the cording joint – four layers around the remainder of the pillow.

So…THIS machine would be my top pick right now – without actually using  it, mind you.  I know.  Old school, right?  There is nothing wrong with old school.  Old school has served me very well for all of my life.

Singer Sewing MachineSINGER 4423 Heavy Duty Extra-High Sewing Speed Sewing Machine with Metal Frame and Stainless Steel Bedplate

But there’s no computer screen.  (Say maybe you.)

That’s right – and less to malfunction.  There’s nothing worse than your machine going out on you in the middle of a sewing project.

The 4423 got 4.5 stars, as well…and is cheaper.  And there are more details you should know – too many for me to list here. Read all the review comments, FAQ’s, and specs here*:  SINGER 4423 Heavy Duty Extra-High Sewing Speed Sewing Machine with Metal Frame and Stainless Steel Bedplate

This machine is said to be extra hardy with its heavy duty metal frame.  It will sew over several layers of fabric, which YOU WILL NEED for sewing certain home decor items.  Speed is a plus, but that’s not something that would be high on my list.

My affiliate link*:

 //ws-na.amazon-adsystem.com/widgets/q?ServiceVersion=20070822&OneJS=1&Operation=GetAdHtml&MarketPlace=US&source=ac&ref=tf_til&ad_type=product_link&tracking_id=curtqueecre0b-20&marketplace=amazon&region=US&placement=B003VWXZQ0&asins=B003VWXZQ0&linkId=WNZKDK4NMK7KEU7T&show_border=true&link_opens_in_new_window=true

There is something else to consider.  If you are just learning to sew and not sure you’ll even like it, you could go with a less expensive machine with the idea of upgrading later.  There are many Brother machines for under $100.

But…the Singer 4423 is so inexpensive, it’s worth getting it for the long haul.  If you decide to never sew again, you could sell it easily on eBay – or keep it for those mending projects we all put off forever.  😉

Just so you know, I plan to order this machine and give it a test on several projects before a sure-fire recommendation.  If you’re not a follower by email posts, you can sign up here so you won’t miss out on my next post about this machine.  Plus, you get my free e-book, which is a PDF that doesn’t require a special e-reader device.  🙂

Any questions or comments about these choices?  I know I haven’t discussed other brands, but I can.  What brand would you like me to review?

Blessings~

125 px Signature


I’m sharing this post at Metamorphosis Monday.

Plan Your Someday!

I have big news for you today – something fun in our future.  I’m very excited about it all, and I hope you will be, too.

Do you have projects you’d like to complete someday?  Do you put off sewing projects, only to find someday  never comes?

For your home decor sewing projects, your someday is coming soon!  January of 2016 begins your someday.

In my recent survey, many of you said your home needs window treatments of some kind.  Since holidays are upon us, we’ll take the remaining time this year to plan and prepare.

We’ll begin forming groups for window treatment projects in January.  That’s right.  We’re going to sew together.  I’m signing on as your cheerleader (and coach)!

Your Someday

We’ll start by forming individual groups, such as

“Drapery Panel Populous:  Someday  in 5 days, only 1-2 hours a day”

“Roman Shades Society:  Someday  in 7 days, only 1-2 hours a day”

I’ll add groups for other projects you’d like to complete.  I’ll be your encourager!  🙂

When you sign up for a project group, I’ll add you to a special email list where you’ll get daily encouragement, instruction, and help where you need it.  Facebook groups will be formed so you can all discuss your projects and ask me (and the others in your group) questions about what you’re working on.  Group size will be limited, so start planning now.

Won’t this be helpful for getting your New Year’s decorating resolutions done?

Spread the word.

Gather your friends.

Get ready for Someday.

For now, all you need to do is decide what project you’d like to start first – drapery panels or Roman shades.  Collect your fabric and thread, and wait for me to say “Go” after we turn our calendar page to the new year.

Craftsy sewing classes aren’t required, but they provide all the details you need for your home sewing projects.  Craftsy will have a huge sale next week – better deals than I’ve ever seen.  While I’ll be your cheerleader, Craftsy classes give you detailed instructions and guide you through excellent video demonstrations.

I’m not saying you must sign up for a Craftsy class.  You can totally join your project group and use the tutorials on my site for your project how-to’s.  I do have to say, though, the Craftsy instructors give you downloadable worksheets for figuring yardage for fabric purchases.  There’s also a download for computing pleat measurements for pleated draperies.  Those are very helpful – worth the sale price of the class all on their own!

I encourage you to enroll in the classes for all the projects you’d like to do in 2016.  Make it a Christmas gift to yourself.  🙂

Start planning now for your home transformation in 2016.  We’ll do it together!  Head on over to Craftsy and check out their classes.  Add classes to your wish list so you’ll be ready for the sale next week.  Here’s a great place to start.

What projects would you like to complete Someday  in January?  Valances?  Table skirts and toppers?  Bedding?

Blessings~

Signature

Let’s Talk Pillows and Stuffing!

How was your weekend?  Did you do something fun, work on a project, or both?

HH and I took a quick trip to visit my parents over the weekend.  It was so nice…and relaxing…and therapeutic.  Isn’t that what time with family is all about?  While we drove, I was able to hand-sew the closure for a new pillow I made for HH last week.

I’ll publish the tutorial tomorrow for sewing brush fringe into a pillow.  For today, I’d like to share some recently discovered resources for your home decor projects.

In late July, I visited Brick House Fabrics* to check out their site. I found some beautiful fabrics to use for upcoming projects.  (I contacted them about advertising on my site.  You may have noticed their ad in my sidebar.)

Brick House Fabrics

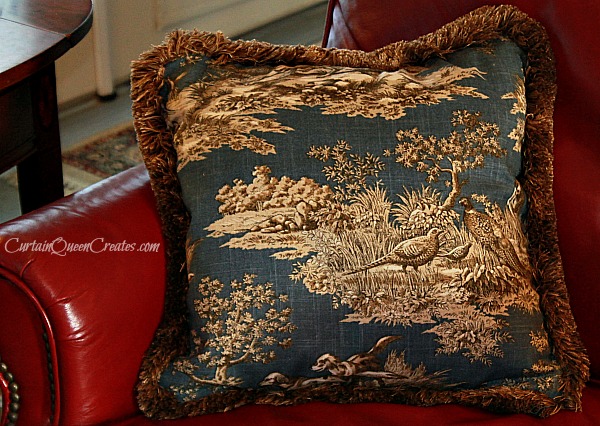
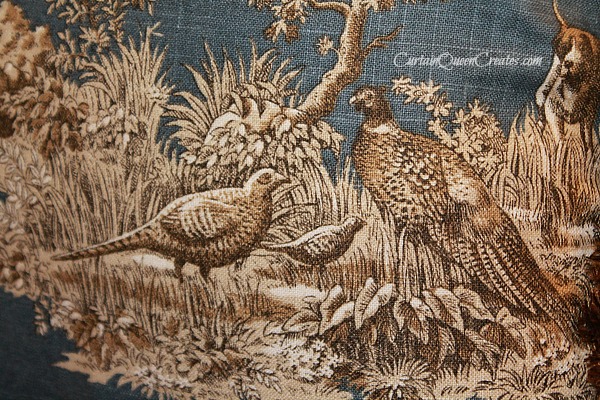
My choice that day was a fabric I knew HH or any other pheasant hunter would like.  Isn’t this toile print with pheasants and hunting dogs wonderful?  🙂

Brick House Fabric Pillow

I received my fabric in three days.  Three!  There’s no extra charge for that quick delivery, either.  That’s just their regular delivery process.  An employee pulls the fabrics and ships them, usually the same day you order.  I received emails confirming my order and when it shipped – along with an expected delivery date.

Get this:  the email is from a real person.  Your order processor clearly provides their name so you can contact them with any questions you have.  Isn’t that level of customer service amazing – and pro-active?

When ordering, please note that some fabrics come in specified cut lengths.  The toile I ordered is sold in one-yard blocks, which is perfect for pillows and chair cushions.

I was very pleased with the quality of the pheasant blue toile that I found under Brick House Fabrics’ lodge and cabin style in their sidebar.

Toile Pheasant Fabric

Within days, I ordered a second choice (can hardly wait to do that project).  Same fast delivery, same quality.  Isn’t it nice when something is easy for a change?  Click their ad to the right or here** if you’d like to check out their many choices of fabrics.  Don’t forget to check out their discount fabrics, too.

Speaking of discount, Brick House Fabrics posts specials on their  Facebook page, so “Like” their page and get those notifications.  This is the fabric they posted yesterday.

Brick House FabricsSource*

I have a friend in Georgia who made kitchen curtains using this fabric.  Her beautiful kitchen was featured in Southern Living Magazine that year, and her window treatments were a star!

Another discovery last week is this pillow filler at Wal-Mart.  It is the best of all types I’ve used – and at a great price for making your own pillow inserts!

Pillow Stuffing

UPDATE August, 2015:  I came back to show you my Pillowcubes review post.  They are now my favorite inserts – even ranking over home-made.

Thank you for visiting.  I hope these resources inspire you and help you with your home decor DIY projects!  Please follow me through email or any other type of social media.  Scroll to the top of my page for the links.

Signature

I’m sharing with Metamorphosis Monday.  Join us!
*Post contains affiliate links.  See disclosure here.

DIY No-Sew Roll Pillow

Are you ready for easy?  I don’t mean easy, I mean really easy!

In my beginning post about Making the Master Pillow Shams, I promised you an easy no-sew pillow.  Who doesn’t love quick…and easy…and no-sew?

DIY Roll Pillow Complete

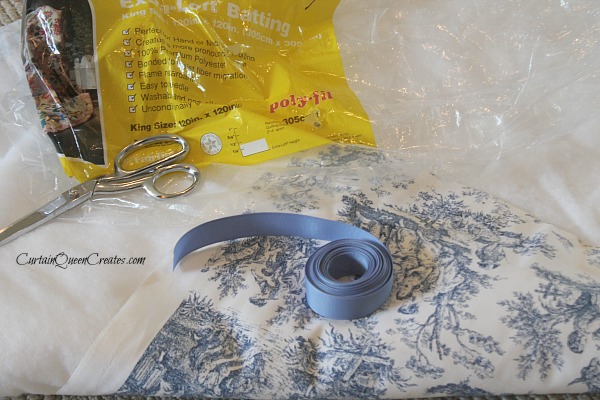
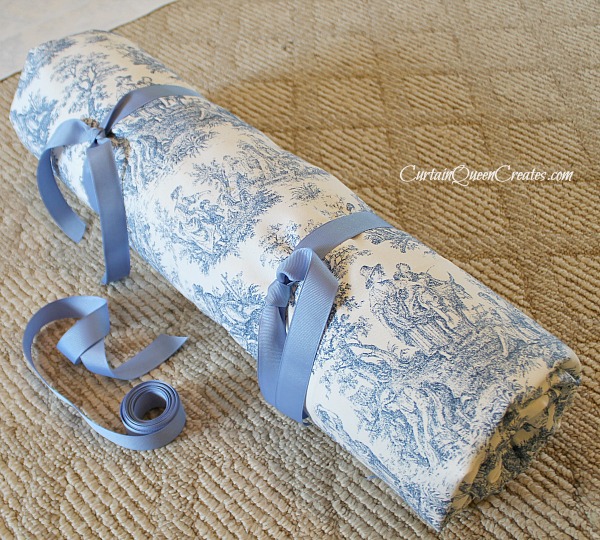
This roll pillow is made with one width of your chosen fabric, some poly batting, a little ribbon, and a little time.

DIY Roll Pillow Supplies

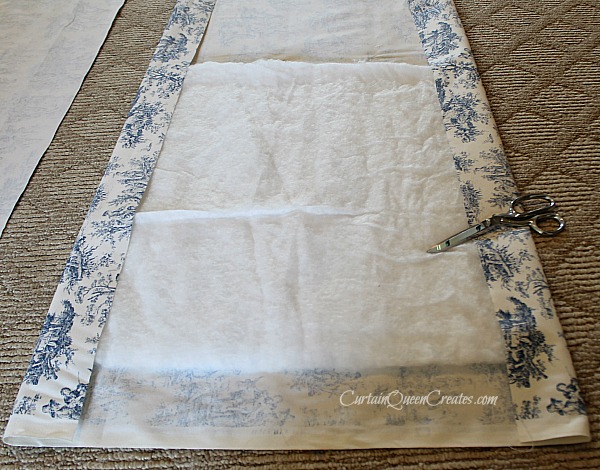
Oh, and a pair of scissors.  Cut your fabric to the width of your desired pillow plus 8 inches.  For the length of your strip, use the full width of the fabric (selvage to selvage).  Cut the poly batting to your finished pillow width and 8 inches shorter than the fabric width.  I used 4 layers of 1/4″ batting.

Lay your fabric face-down and place the batting on top with 4 inches exposed around all sides.  Fold the side edges (4 inches each) over the batting.

Fabric and Batting Cut

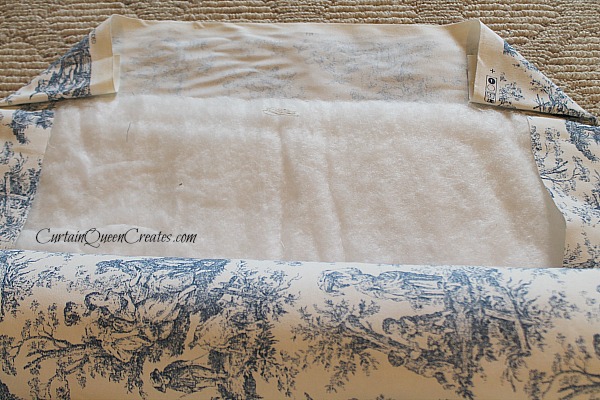
Fold the corners down at the end, like this picture below (except this is the picture for the other end).  I didn’t get a picture of the beginning end.  So, this is your beginning and ending fold.

Beginning and Ending Fold

After folding corners, fold the end over the batting.  (Sorry, another picture of the end fold.)

End Fold

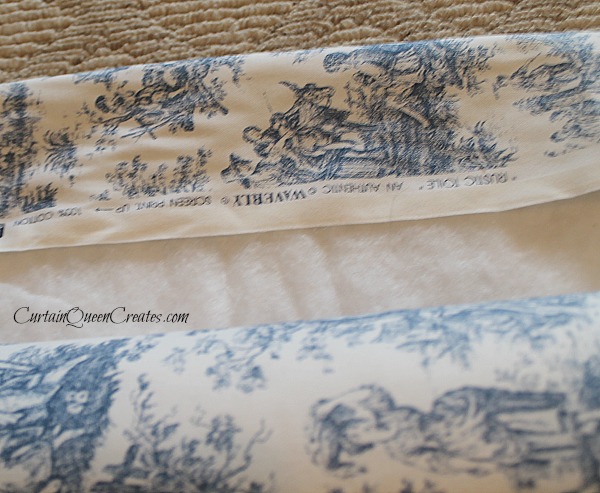
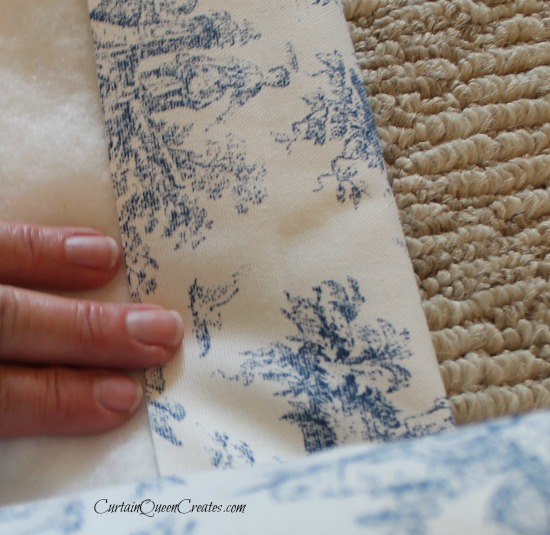
Begin rolling your pillow.  Notice the side edges want to pucker here and there.

Beginning Roll Pillow

Smooth each pucker with your hand as you roll.

Smoothing with Hand

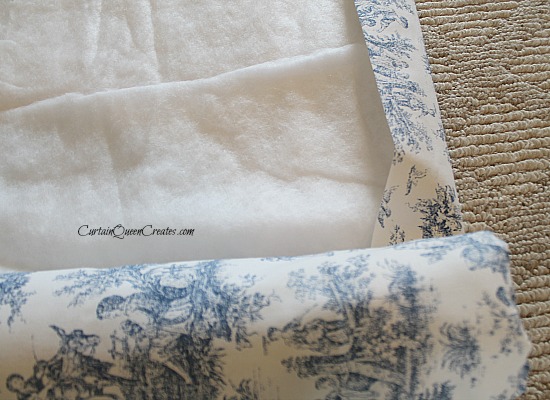
Finish rolling to the end.  Fold the corners as you did the other end (shown previously), and then fold the end flap, as well.

End Fold

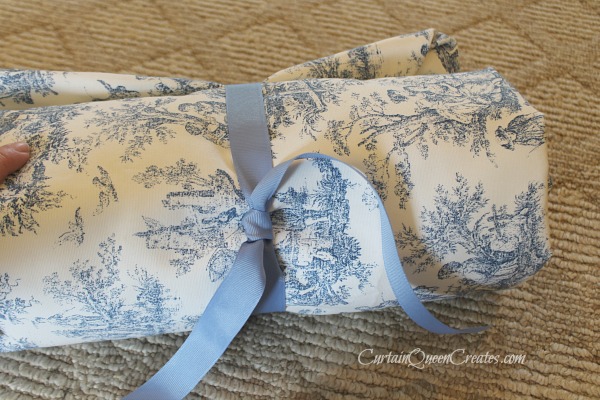
Holding your roll together, secure with a matching ribbon 6-8 inches from the end.

Tying Ribbon

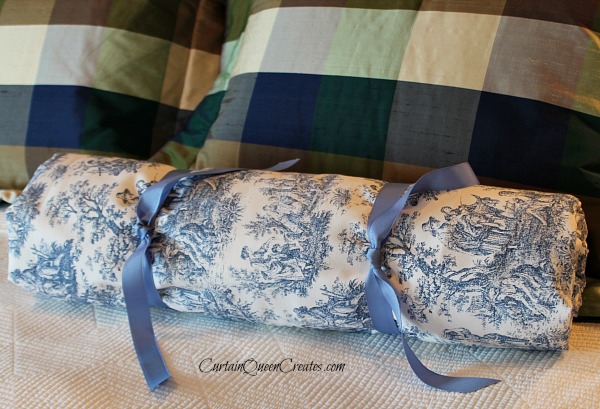
Repeat the ribbon at the other end and adjust if necessary for the size of your pillow.

Roll Pillow Complete

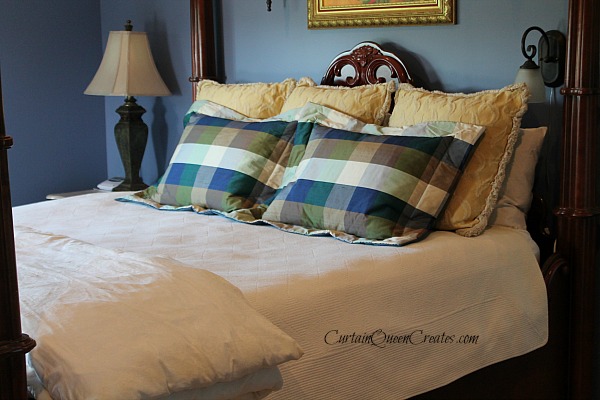
My fabric print is running sideways, so feel free to adjust yours to run the other way if necessary.  Me?  I may actually have my roll placed vertically when I get all the pillows finished and on the bed.

Many of you may have made one of these before.  I’m not so smart that I’ve invented something completely new – just a reminder of sorts.  There are many ways you can make a roll pillow without sewing a stitch.

Have you made a roll pillow similar to this one?  Isn’t it easy?

Blessings~

Pillow Shams With a “No-Flop” Flange – Tutorial

You saw these new shams yesterday when I gave you the first peek.  They are the easiest shams you can make, in my opinion.

Pillow Shams with Flange

For a flange that doesn’t flop forward, you need to add something that gives the sham some body or stiffening.  I used an 8-ounce poly quilt batting that was left over from former projects.

These shams are sized for standard pillows with a 3″ flange.  The cut measurement for the front fabric is 27″ x 34″.  The poly batting and a piece of lining are cut to the same measurements.

Sham Front Assembly

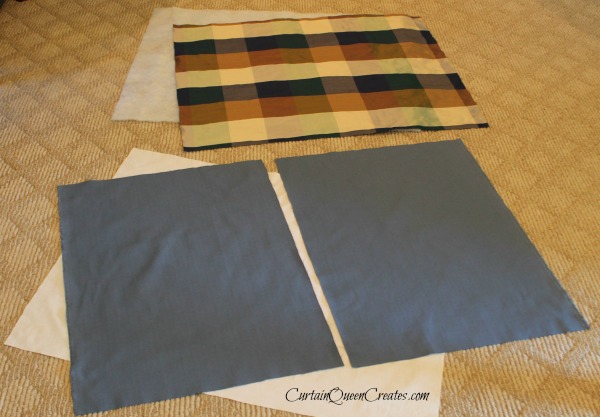
Cut two pieces for the reverse side of the sham at 27″ x 22″.  I used a leftover fabric from a previous project, which happened to be the perfect color.

Cut Fabrics for Shams

For light-colored background front fabrics, you can use simple white lining for the back side.  No one ever sees the back, right?

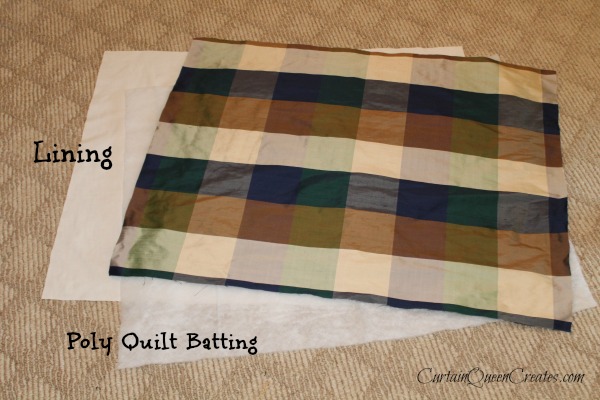
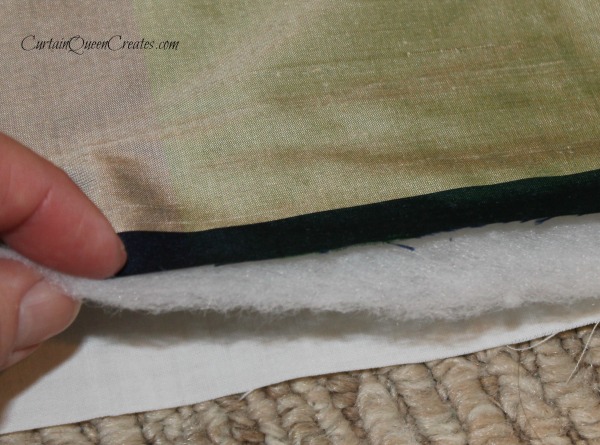
To assemble the front of the sham, lay the 27″ x 34″ lining piece on a flat surface, then place the batting on top of the lining, and the front fabric is placed face-up over the other two pieces.

Layers of Sham Front

Your making a poly batting sandwich.  😉

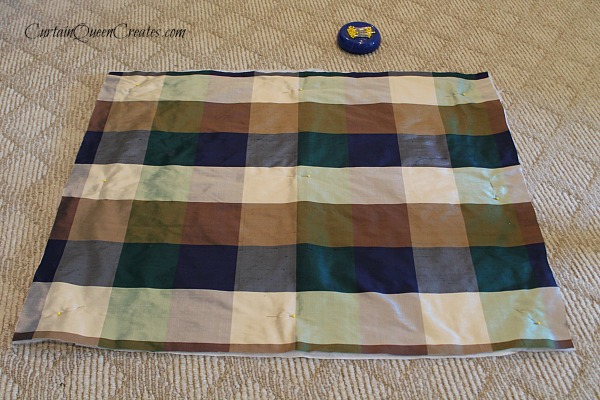
Line up the edges of the 3 layers and pin together to secure for sewing.

Pinning for Sewing

Sew around all four sides, then zig-zag or serge to prevent fabric ravel.  If you have a serger, you can sew your seam and secure your ravel all in one step.

Sham Fronts Sewn

Now you’re ready for the back.  Press a 1″ hem along the edges for the sham opening, then press down another inch.

Sham Opening Hems

Sew the hems, then serge or zig-zag around the raw edges of the sham.  Place the back pieces face-down on top of the front assembly (front fabric is face-up).

Placing Sham Back Pieces

I flipped an edge up (above) so you can see the under side, which will be the outer side after sewing.  You may notice that the batting drew up the top fabric so that the back pieces run a little over the edges of the front piece.  I sewed mine together with a slight overhang so my back wouldn’t protrude out around the edges when it’s turned right-side-out.

Pin around all sham edges.

Pinned Sham Assembly

Sew around the sham at about 5/8″ from edge.

Sham Edges Sewn

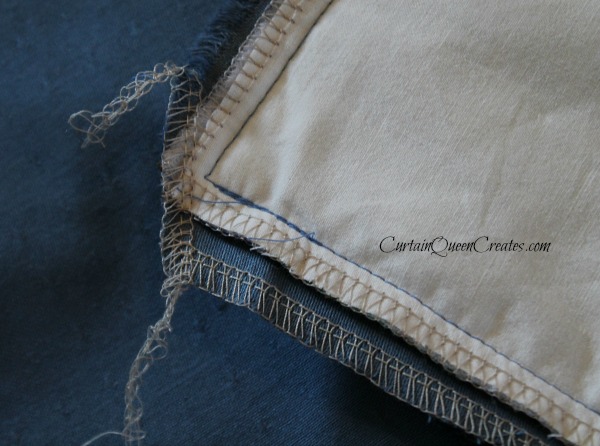
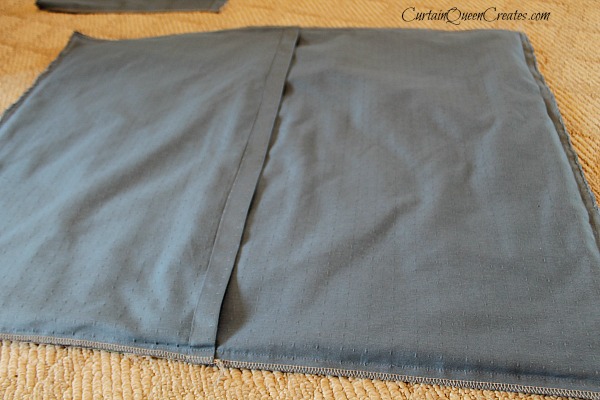
Cut corners at a slant 1/4″ from the seam.  Serge or zig-zag raw edge.  You can see in this picture how the reverse side was sewn further from the edge than the front sandwich, about 1/4″ difference.  Of course, corners always come out a little different because many sewing machines draw the under fabric while sewing.  Well, mine does, anyway.
Corner Cuts

Invert sham and push corners out well to square them off.  Press sham edges so the reverse side doesn’t peek out along the front edge.
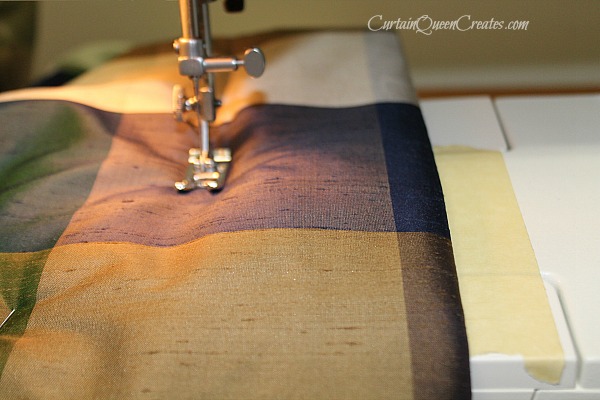
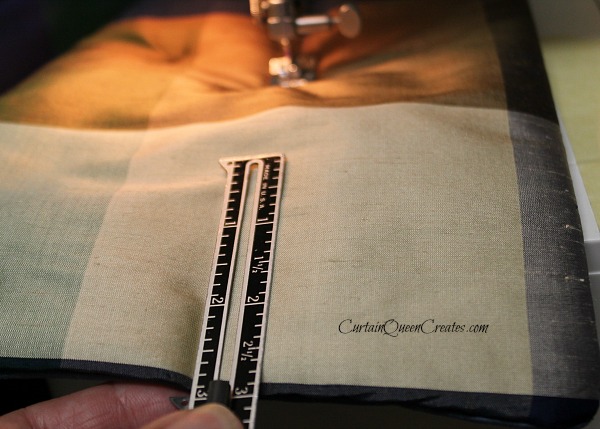
Sew a seam through all layers at 3″ from the edge.

Sewing Flange

Notice that the masking tape placed on the sewing machine at 3″ from needle location gives me a guide for the sham edge to follow.  Painter Artist Mom (PAM), who also sews, taught me that trick.  Thanks, PAM!  See?  I was listening.  🙂

The Tape Trick

When you get close to a turn, measure 3″ from the adjacent edge to show you where exactly to make the turn.

Measuring Turns

For a crisp corner turn, remember to place your needle in the down position at turn point, lift presser foot, pivot 45°, lower presser foot, and continue sewing.

Sewing Complete

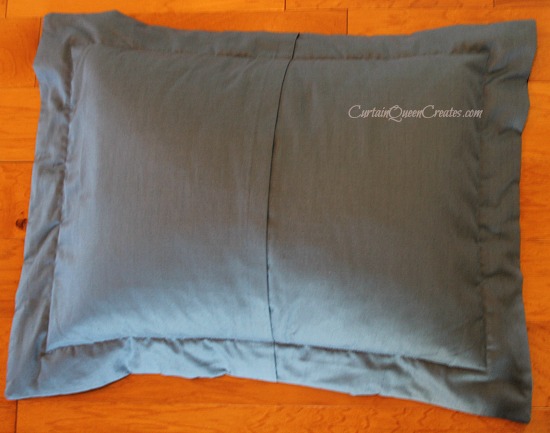
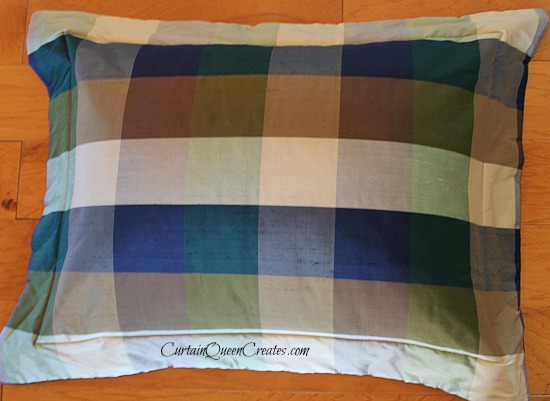
Press the sham once more and insert your pillow.  Here is how the back side of the pillow looks.  Notice how nice and smooth the opening lies, rather than gaping open.

Back Side of Sham

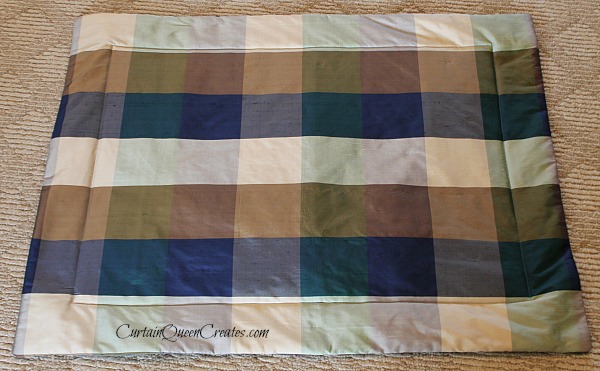
The front side shows the pillow is stuffed evenly and fits nicely inside the sham.

Finished Pillow Sham

Don’t you think these look easy to make?  Do you plan to make some pillow shams with a flange?

Blessings~