Keep On Keeping On!

Keep On Keeping On!

Thank you for your patience these last few months.  I’m sorry for being so quiet along the way to “recovery”.  Doctor visits sure can become a full-time job!

I actually started a chemo regimen six weeks ago.  The scan last Monday showed that things are going successfully on standard chemo.  But, we have recent and better news.  Praise God!  After much searching, a mutation was found in my cancer cells that allows for a targeted chemo pill rather than standard chemo treatments.

That means, the new drug will go after and destroy only my cancer cells and not my healthy ones.  No sickness or horrible side effects from here on out!  For those of you who were praying for me, thank you, thank you, thank you!  I will remain on the same pill until my body resists it, which in most cases means years rather than months. We are hopeful and still prayerful about it all, and the horizon looks good.


Keep On Keeping On!

I feel life can return to somewhat normalcy again.  Not totally, though, because the Multiple Sclerosis symptoms are with me each day still.  I’m eating to support my body’s healing and taking supplements to mend my damaged nerves.  It appears both conditions (lung cancer and MS) will be with me the rest of my life and will require regular check-ups and managing through lifestyle changes.  God is good!

I’ve learned to pace myself and take things easier.

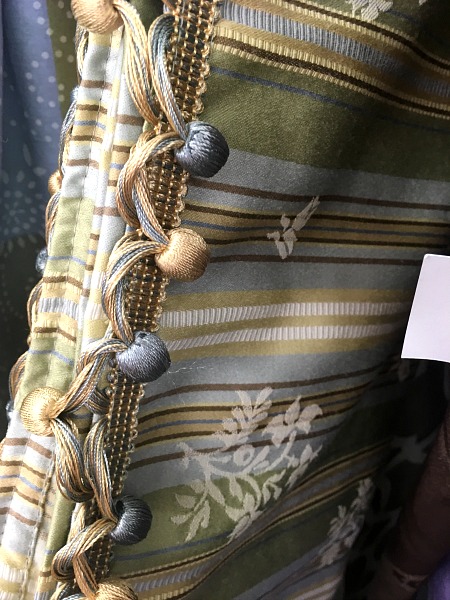
During the last two months, I took some time to delete old posts that aren’t sewing related.  That should reduce the loading time when accessing my site.  It was sad to part with such a huge chunk of my life from the past five years, but it needed to be done.

God has shown me how to leave the courses open.  So, Curtain Queen Creates will remain as a support site for the sewing courses.  I plan to keep on keeping on, publishing sewing posts occasionally to spur you on with sewing inspiration!  Since my energy isn’t completely back to normal, I can’t promise new projects anytime soon, but the want-to is there, which is a beginning.  Right?

I’m excited to get rolling again, along with writing for the Embrace This Season website.  You can read about recent changes there in this post, The Hardest Seasons.

Blessings~


Valances on Boards

In the world of window treatment design, we’ve gotten away from valances. It’s been all about panels for several years now.

Panels

But, in case you still want a valance or two, I thought I’d talk about something other than your typical shirred-on-a-rod valance treatment. A more custom look is to mount your treatment to a board. I pulled this old one out of my work room to show you a little about mounting and hanging. Just plopped it on top of my stair railing to snap some pictures, y’all, so nothing fancy here.

Valance on Board

I made these to fit our living room windows at the Georgia house, where we had two single windows. When we moved, I joined the boards together, because we now have a double window. This valance was eventually removed altogether when I received some panels from my MIL for the living room/office.

Using a straight bracket, but a large and sturdy one, I joined the two valance boards together.

Double Valance Bracket

I normally mount boards to a wall, but these needed to go inside the window casing. I attached an L-bracket to each end, on the top side to avoid putting screws through my treatment on the sides when attaching to the wood casing.

For this type of application, use two brackets at each end for extra strength. Notice you don’t see the ugly stapled fabric edges on top of the board. You don’t have to do yours this way, but it looks better to cover the top with a “finishing strip”.

The finishing strip is made by cutting a fabric strip the size of your board and ironing 1/4″ under on all sides. Then attach it with only a few staples up there. No need for many, because you’ve done all the securing staples underneath.

Valance L-Brackets

If you think covering the top doesn’t matter because it won’t show, consider the view from all angles. Can you see the top of your treatment as you come down the stairs? Is there a loft area above? The slightest elevation allows all that ugliness to show, so you’ll probably be happier in the long run if you do it right the first time.

Speaking of staples, it drives me crazy to see a treatment with staples exposed on the front side. Everything should be stapled on the top of the board, nothing on the front. If you absolutely must staple the front, it should be under a pleat, some gathers, or trim. In the past, if I had no choice but to staple the front, I planned ahead for some sort of trim or fringe to hide those shiny little things.

Since this treatment was installed inside the double window casing, I arranged the brackets different from my usual way. Another factor was the transom above the double windows, all one window unit with no wood to screw a bracket into along the length of it. It’s the same type of window as in the dining room, which is the first picture on this page. The ends held all the weight, so the strongest brackets ruled here!

When mounting along the top and inside a window casing, like below, no brackets are necessary. My favorite way to hang boards! You simply screw through the board into the upper molding. All screws are hidden behind your treatment.

Roman Shades

This same room has a door, so I made the same working Roman shade for our door. Here you can see how to attach a board to a door, wall, or case molding.

Mounting Board to Door

The L-brackets hold the treatment securely. Plan ahead for your width of treatment to allow room for the mounting brackets if you plan to attach outside your window case molding, unless it’ll be mounted well above the window.

Notice I covered the board with the window treatment fabric. Normally I cover it with lining fabric, the ugly hot-glued side “up” (where your finishing strip will cover it all). With this Roman Shade, the ends are visible, so I didn’t want ugly white lining glaring at each end. It pays to think ahead and consider all angles.

If you’re just beginning to make your own treatments, make lots of notes, draw sketches, with separate sketches to include all measurements. No need for artistic ability here, just getting it down so you can “picture” the end results. I always make “finished” measurement sketches first, then adapt that to “cut measurements” for each piece. It may seem backwards, but I start with the big picture, then I break it down. Plan each step of the process before you make the first cut.

I hope I’ve provided a little information to help your treatment be beautiful and easy to hang.

I’m Looking Up!

When writing my last post in October, I expected to be away for a little while.  I never dreamed it would take this long for me to get back to you!

After doctor visits and testing, Multiple Sclerosis was confirmed the week after Thanksgiving.  MS was a sobering diagnosis, but I viewed it as manageable.  Life would go on, and I began following an autoimmune diet.  But that’s not the end of the long trail of doctor visits and testing.

Romans 12.12

Three days before Christmas, a second diagnosis was official – non-small cell adenocarcinoma – lung cancer.  It was a surprising occurrence, given the fact that I have no risk factors (like smoking or living with second-hand smoke).  There is a wide range of treatment options available.

God brought peace as we were covered with prayer from friends and family, but peace didn’t come easy.  It’s been another lesson of trust.  Every anxious thought must be held captive.  Our God is bigger than any fear!

If you are in a trial of any type, I hope this song ministers to you as much as it did for me.

We’ve experienced blessings from the Lord each day on our journey since October.  Our Christmas wasn’t hurried or rushed.  It was a blessing to relish family time in a way like never before.   With a new perspective, it was one of our best Christmases yet!

As I look at the future of Curtain Queen Creates, I don’t plan to continue with even the sewing aspects.  I am extremely sad to let go of this fulfilling thing that has consumed much of my life these past five years.    (I’ve discovered that sickness x 2  can be a full-time job!)  If there are recipes you’d like to add to your file, print them now.  Over the next month or so, I expect to close this site.  😦

Embrace This Season (see today’s post) will continue as a place to write and reflect and share.  I never expected to be embracing a cancer season (or MS, either), but I fully believe God has this new assignment for me.  He may have a new ministry in mind.  I hope you’ll join me at Embrace This SeasonCancer won’t be a main topic there, but “fifty and over” health will be discussed quite often.  🙂

You all have blessed my life so much these past years.  I received far more from you than you received from me.  What a blessing you have been, and I thank you from the bottom of my heart!

Blessings~

5 Time-Saving Tips for Making Window Treatments

Sewing curtains is much like cleaning house.  We don’t necessarily do it because we love the process – but because we love the result – a clean house!  Are you that way, too?

For years, I stitched together window treatments for others.  I squeezed time for sewing between young mom responsibilities.  I crawled out of bed extra early for a couple of stolen sewing hours in the morning and carved away little snippets of sewing time throughout the day.  I made the most of those little blocks of time.  And I mean little!

People often tell me how they wish they could sew, but they don’t have time.  Let’s rid ourselves of that defeatist attitude.  Let’s get creative with our schedules, shall we?

5 Time-Saving Tips

My Top 5 Tips for Making Time for Sewing Window Treatments

Tip #1:

Schedule blocks of time.  Yes, put it on the calendar!  Block out time chunks in the largest blocks you can manage.  (Even small ones are better than nothing, if that’s all you have.)  You won’t know how much you can accomplish in half an hour until you schedule it and work through it.  Try it.  You will be amazed at how much you accomplish in thirty minutes!

Tip #2:

Turn your phone settings to DO NOT DISTURB (DND).  In your phone settings, set a time frame to not be disturbed!  That’s right.  No notifications to distract you.  And, you can still get calls from family and friends who are on your favorites list.  So, if a family member has an emergency, they have access to you during DND.  I love this feature and have a recurring DND for sleep hours every night!  I use it during the daytime for focused work time, too.  Notifications distract, and who needs that?

How to set your phone or DND (Do Not Disturb):

i-Phone:

  1. Go to Settings
  2. Click on Do Not Disturb.
  3. Press the “From and To” to enter your start and stop time.
  4. Click the Scheduled Tab to “On”.
  5. Press “Allow Calls From” and choose Everyone, No one, or Favorites.
  6. Turn on the “Repeated Calls” tab if you wish to hear a second call from the same person within three minutes (which might be an emergency).
  7. Under “Silence”, check Always or Only while iPhone is locked.

Android:

  1. Go to Settings.
  2. Click on Sounds and Notifications.
  3. Scroll down to Do Not Disturb and click the title to go to the screen with the different settings.  Turn “Set Schedule” to “ON”.
  4. You can set the start time and end time you desire for your phone to be on Do Not Disturb mode.
  5. You can also allow exceptions for receiving calls from your favorite contacts only by clicking “Allow Exceptions”,  Click “ON”.  Click “Calls and/or messages from”, and a short menu pops up.  Select the “Favorite contacts only” option to allow calls from friends and family in your favorites list to get through when they call (needed for getting emergency calls).  You can also choose to receive other notifications such as text messages by clicking the “Allow exceptions” tab.
  6. Be sure your the tab is turned to “ON” to activate Do Not Disturb mode before leaving the settings screen.

Tip #3:

Be diligent about limiting time on social media.  Set social media time slots in your schedule and stick to them.  Limit time on Facebook and other media time-gobblers.  Get control of your social life!

Tip #4:

Do project mapping.  Map projects in advance in an orderly, step-by-step, sequential manner.

Tip #5:

Begin your project with the end in mind.  Focus on what you’ll enjoy when you finish – how you’ll enjoy your finished project.  It will boost you through the steps to completion and motivate you!

Blessings~

I’m sharing this post at Metamorphosis Monday.

The Good News and the Bad News

I don’t know which part you’ll see as the good news and which part as the bad news.  I’ll just have to let you decide.  It was two weeks ago when I knew I couldn’t go on publishing posts.  I prepared the email to send out with Friday’s post and said I’d be out for a while due to a vision problem – and pretty much left it at that.

I had/have double vision, making it very hard to do anything much in a timely manner.  I’d published all of my pre-written posts during October – except one more tablescape remains.  When I published a post from scratch, it took three days.  Continuing wasn’t an option at that point.

The double vision is caused by a nerve palsy in one eye and is nothing serious.  It should repair itself within six weeks (which is today!) or months  and will heal on its own.  Randomly.  Unpredictably.  We just have to wait.

HH and I are at peace that God will take care of things in His timing.  Thank you all for your prayers!  You continue to be such a blessing to me!

faith-bible-verseImage Source

I do have other issues happening, so I’m trying to get rest, manage pain, and not stress over things while we investigate further (and wait some more).

Rest has been the best thing!  (OK, well, pain medicine can be pretty awesome, too.)  Without blog post schedules looming, I truly got rest.  Complete rest.  And, it was glorious!

As I prayed for God’s direction through the October and early November weeks, I thought maybe He was closing the door to blogging altogether.  I somehow sensed there would be no more tablescapes, diy projects, recipes, or gardening posts.

But, really, Lord…everything?

The thought of leaving you friends saddened me, of course, but I will do as the Lord directs.  I trust Him completely!  I’m committed to whatever He has for me in my fall season of life.  If God said for me to stop blogging, then so be it.  (Although, please know that I would miss you terribly!)

God knows my desire to help women with problems they sometimes face while sewing window treatments or other home decor items.  Immediately following a God session, I received two emails from readers asking for help.  I love that process of helping you work through those things!  God also knows I enjoy your post comments and our conversation most of all.

Then God brought fresh inspiration and promises – partly in a new direction.  And, He blew me away!

Psalm 37.4Image Source

Slow down.  Relax.  I’ve got this.
Keep Curtain Queen Creates, but make it a sewing-only site to support the sewing readers and course members.
Publish sewing posts occasionally when needed as your health improves.  Don’t stress.
Begin a new blog with the blog name I gave you three years ago.  Now’s the time.  Do it with My blessing.

I quickly took a pen to paper as He spilled blog post titles in a list of ten.  I instantly had new topics for this new blog with the title He inspired so long ago (and that I didn’t yet understand).

I painted these words on this old drawer a few years ago, and they stuck like glue!

DIY Drawer Tray

God laid it all out for me, and it was comforting… peaceful…and without time constraints. He placed one post per week  in my heart.  I realized I could do that even now with my eyesight askew.  It will be a slower, more restful pace, and I realize I need that  as I learn to manage my health in the proper way.

I have one final tablescape post for you tomorrow.  It’s a post I prepared in September for Thanksgiving.  🙂  Can it be our celebration of thankfulness for new beginnings?

Embrace This Season

The words that spill out of a paint brush occasionally stick with us for far longer.

I’m so happy for the time we’ve had here at CQC – and for the fun and blessings we’ve shared.  CQC’s future blog look will be leaner with the new focus on sewing home decor specifically.  I realize not everyone will stick around for that, and you shouldn’t if sewing isn’t your thing.  You won’t hurt my feelings if you unsubscribe after tomorrow’s tablescape post.  For those who choose to remain for the sewing posts, I’m very excited about our new streamlined focus.  I hope you are, too.

I’d like to give you all a huge (virtual) hug. – and wish I could for real!

My hope is that you’ll subscribe to receive posts through email at my new blog as we commit to Embrace This Season.  My first blog post there is similar to this post here today – sort of an opening and explanation of origin.  Future posts will include topics that support and encourage women in our fall and winter seasons of life.

I’m looking forward to it and hope you are, too.  Thank you all again.  Very much!  Until tomorrow then?

Blessings~


Save

Save

Save

Save

Save

How to Shop for Thrift Store Fabric Bargains

Have you ever noticed window treatments for sale at a thrift store?  Rarely do they fit your style and window size, much less your room decor colors needed.  However, it is possible to find fabric  at the thrift store for making your own window treatments.  Before you get grossed out by purchasing things from some unknown person, remember:  Lysol spray is your friend!  😉

For starters, go to the section with bedding – bed skirts and spreads, sheets, coverlets, etc.

That is likely the section where you’ll find other things related mixed among them.  We southern women tend to like anything with Magnolias.  This inexpensive piece of fabric could be used for a valance or a table topper or skirt.  Tailored skirts require very little fabric!  (See Tailored Table Skirt – Easy 2-Seam DIY.)

Thrift Store Fabrics

Next is another piece that’s a similar size.  I don’t remember if this is a sheet, but it had a heavier weight than a sheet.  It would be perfect for making a table topper (Corded Table Topper) – or a skirt.   I also see a fresh and clean Ruffled Shower Curtain with this piece.

Thrift Store Fabric Finds

The heavier weight of this piece could be used for a small window treatment (such as a valance), covering a seat cushion (Vanity Stool Update), or for a Gathered Bed Skirt.

Thrift Store Upholstry Fabric

This piece is similar but with a bonus – bullion fringe!

Thrift Store Fabric and Fringe

Any fringe is an awesome find.  This next one is a valance with ball tassel fringe.  If the colors are right for your home, you might be able to adapt the valance.  You can always use it for pillows!  If all else fails, remove the fringe for use later on a pillow (Sew Easy Fringed Pillow) or table topper (Fringed Table Topper DIY) .

Thrift Store Trims

If you don’t like purple curtain panels, the grommets alone are worth more than the price of the panels.  Simply remove and save for later!

Thrift Store Grommet Panels

In the sheet section, this flannel queen size is large enough for a winter-time change for a Body Pillow Sham and/or to make a winter themed Table Cloth With a Professional Finish.  An excellent fabric choice for $3.98!

Thruft Store Table Cloth

These plaids arrived on the market over twenty years ago but are still rather popular.

Thrift Store Decorator FabricThrift Store Plaid Chintz

Diamonds are as timeless as many plaids and stripes.  Great for a girl’s room!

Thrift Store Diamond Print

This one reminded me of a former shower curtain I made for ID Diva’s bathroom.

Thrift Store Flowery Sheet

I nearly brought this next one home.  I’m on a huge orange kick right now.   The price on this Queen flat sheet with two pillow cases was !15.00.  I would have paid that for an entire queen set, but the fitted sheet somehow was separated from the set (and I looked everywhere for it).  The feel of this sheet was a dream!

Thrift Store Diamond Print

I hope you stumble upon a grouping of quilts!  These make wonderful throws, table cloths, and table skirts.  For a skirt, simply throw a quilt over a small table and turn the corners under for a puddled effect.  Use a quilt for a single curtain panel by clipping it to rings spread across a pole and swooping the panel to one side.  It’s so warm and homey!  Charming and easy, too!

Thrift Store Quilts

That about covers it!  Did you get a new idea or two?

I hope you have a fun Halloween tomorrow and give out/eat lots of candy.  😉

Blessings~


Save

Save

Save

Save

Save

Save